We have already discussed building Web API with ASP.NET Core in our earlier blogs Build a minimal API using ASP.Net Core with Android Studio Code. We have also discussed building ASP.NET Core API with Android Studio and macOS. ASP.NET Web API is one of the best frameworks for creating web APIs over the .NET framework. The below given ASP.NET Core web API tutorial will help you build an API application.
Build a Web API Project
Here we will use ASP.NET Core Web API to build a web API that will return the below-given products. jQuery displays the results for the front-end web pages. Follow the below-given steps to create a web API with ASP.NET Core using C#.
Step 1: Create a new project
First, start Visual Studio in your system and choose the option ‘New Project.’
You can also create a project from File>New>Project.
Navigate to the Template pane and choose Installed Templates and then expand the Visual C# node.
In the Visual C# bar select the Web option.
Navigate to the project templates and choose the ASP.NET Web Application option.
Name the project ProductsApp and click on the OK button.
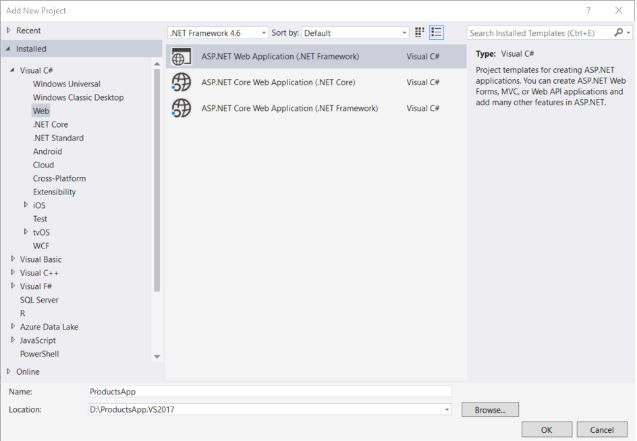
Now, in the new project that you just created, choose the ‘Empty’ template. Look under ‘Add folders and core references for’ and check the Web API box and click on ‘OK.’

Step 2: Adding a Model
A model is a kind of object that refers to the data in your app. Your model can be automatically serialized to XML, JSON, and other formats with the help of ASP.NET Web API, and after that, it can write the serialized data in the HTTP response message body. If a client is able to read the serialization format it can easily deserialize the object. Most clients have XML or JSON parsing capabilities. Moreover, the Accept header in the HTTP request message can be adjusted by the client to specify the desired format. It is important to build a web API for ASP.NET Core app development.
Let's begin by building a straightforward model that symbolizes a product.
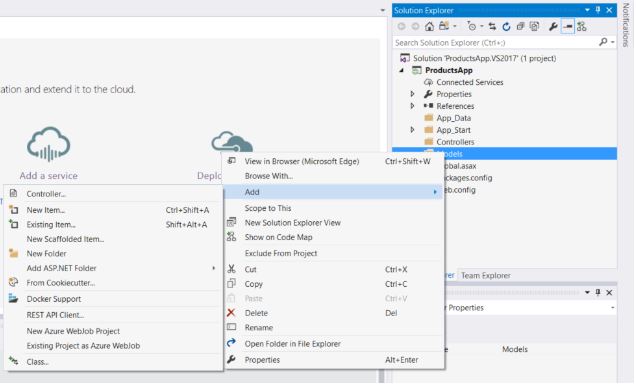
If you cannot see Solution Explorer, click on the ‘View’ option and choose ‘Select Explorer.’
Now, in the Solution Explorer menu, right-click on the Model folder.
Go to the context menu, click on the ‘Add’ option, and then ‘Class.’
Give the name to the class ‘Product.’ Add the below-given properties to the ‘Product’ class.
Step 3: Add a Controller
Here a controller is an object that controls HTTP requests. It will help you return the number of products or just one specific product specified by ID.
Under the Solution Explorer, right-click on the controller's folder. First, select ‘Add’ and then choose ‘Controller.’
Go to the Add Scaffold dialog, and choose Web API Controller- Empty click on the ‘Add’ button.

Under the Add Controller dialog, and then name the controller ‘ProductController’ and then click Add.
Next, the scaffolding creates the name of the file as ProductController.cs in the Controller folder.
Note: Your controllers don't have to go in a folder called "Controllers." Simply said, a folder name is a useful approach to arranging your source files.
Double-click the file to open it if it isn't already open. In this file's place, substitute the following code:
Products are kept in a fixed array inside the controller class in order to keep the example straightforward. Naturally, you would query a database or use some external data source in a real application.
Two product return methods are specified by the controller:
The GetAllProducts function returns an IEnumerableProduct> type that contains the whole list of items.
By using its ID, the GetProduct function searches for a single product.
Step 4: Calling the Web API with jQuery and JavaScript
Here, we will add an HTML page that uses AJAX language to call the web API. jQuery will help with the AJAX calls plus update pages with results.
Under the ‘Solution Explorer’, right-click on the project and then choose ‘Add’ after that choose ‘New Item.’
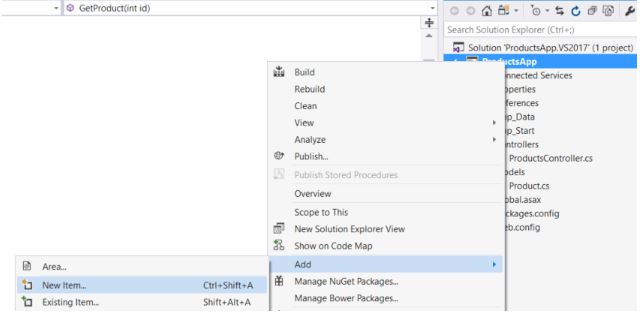
Choose the HTML Page item after choosing the Web node under Visual C# in the Add New Item box. Index.html is the page's name.

Replace all the code with the code given below.
There are many ways to get jQuery. For instance, here we have used Microsoft Ajax CDN. You will also download this same thing from http://jquery.com/.
Step 5: Getting a PRODUCT by ID
In order to get a product by ID, send an HTTP GET request to "/api/products/id", where id is referred to the product ID. The ASP.NET Core web API development is made easy.
Step 6: Run the App
Click on the F5 button to start debugging the app. The website will look like the following.

Source: learn.microsoft.com

No comments:
Post a Comment